
Setting up Tesla Custom Integration with Home Assistant on Docker
I previously wrote a blog describing how to set up your own authentication for the Tesla Custom Integration with Home Assistant (HA). This was for Home Assistant running in Operating System mode. For those who are running Tesla Custom Integration with Home Assistant on a Docker container this will enable you to do the same thing. It is more complex, and I’ve done my best to simplify the configuration using CloudFlare and docker-compose.yml.
Credit to both: Iain Bullock for Tesla HTTP Proxy Docker and Elliott Balsley for Tesla HTTP Proxy-Addon
Preparation: To use the API, you must register a developer account with Tesla and (at least formally) an app. When setting up the app, Tesla requires a web server that can be accessed from the Internet and one which certain certificates are stored.
Therefore, the software components are first installed and configured on the HA server. The server will later be made accessible on the Internet and the Tesla developer account will then be created including app registration.
Here are the steps, with the assumption that you have Home Assistant already operational and is running in a Docker container. If you are running Home Assistant in Operating System mode then check out my previous blog.
- Ensure your Home Assistant is accessible over the internet.
- Install Nginx Web Server
- Enable a Secondary Cloudflare Zero Trust tunnel
- Create a Tesla developer account
- Install Tesla HTTP Proxy configuration
- Configure Tesla HTTP Proxy add-on
- Install the Tesla Custom Integration
1. Ensure Home Assistant is accessible of the internet
It is critical that the Tesla Service can access your Tesla HTTP Proxy instance. I’ve previously written a blog showing how to securely expose your Home Assistant instance this with Cloudflare Zero Trust. You can use alternate methods providing Tesla recognise the SSL certificate.
2. Install Nginx Web Server
Tesla requires access to a couple of private keys to validate your configuration. This is best hosted on Nginx which is accessed through a Cloudflare Zero Trust tunnel to provide a secure solution without the need to mess with SSL certs.
2.1 Create directories to host webserver
In this example Home Assistant is running on a Linux host within the /config directory. I recommend simply creating the necessary directories within:
Note: If you are running HA in an alternate directory from your Home Assistant docker-compose.yml you need to substitute /config with your location throughout this guide.
$ mkdir -p /config/nginx/htdocs # Serves up the public key for Tesla to read called com.tesla.3p.public-key.pem
$ mkdir -p /config/nginx/conf
Place your modified version of nginx_tesla.conf into /config/nginx/conf/ based on your fully qualified domain name (FQDN).
Note: The ‘Flask’ app will be configured in a following step. This serves the webpage interfacing with Tesla to create the secure keys.
server {
    listen 80;
    listen [::]:80;
    server_name tesla.yourdomain.com; # Change to match your own FQDN
    root /config/nginx/htdocs;
    # static public key for Tesla
    location /.well-known/appspecific/ {
        try_files /com.tesla.3p.public-key.pem =404;
    }
        # temporary Flask app for initial auth
    location / {
        proxy_pass http://192.168.1.103:8099; # Change to hostname or IP of your Docker host
    }
}
2.2 Create a Docker compose file
This will start a nginx webserver listening on port 8888 and using the above conf file.
services:
  nginx:
    image: nginx
    container_name: nginx_server
    restart: always
    ports:
      - "8888:80"
    volumes:
      - /config/nginx/conf/nginx_tesla.conf:/etc/nginx/conf.d/default.conf
      - /config/nginx/htdocs:/config/nginx/htdocs
$ docker compose up -d
Hint: Leave this terminal window open watching the logs, it will help if you need to debug anything.
$ docker compose logs -f
3. Enable a Secondary Zero Trust tunnel.
Step 1 showed you how you can connect to your HA instance via a Cloudflare Zero trust tunnel. This negates the need to modify your router and port forward and manages the SSL certificate for you. With this configuration you will setup a second website so you will have two URL’s pointing at the HA host. One is your HA instance, the other is the Apache server setup in step 2. This will be used to share the *pem files with Tesla to validate and authenticate the Tesla API.
3.1 Get started
Visit CloudFlare website, sign in with your account.
3.2 Navigate to Zero Trust tunnel
Create a zero trust tunnel, and chose Configure.
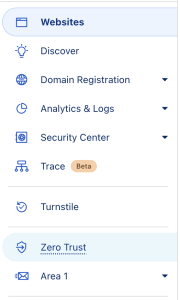


3.3 Add a public hostname
You should already have one which was defined in step 1, choose to add one for Tesla API to authenticate against.

3.4 Configuring your Tesla API public host name
When setting up your Nginx web server, it’s essential to designate a subdomain specifically for Tesla’s API authentication. This step is crucial as it establishes a direct line of communication between Tesla’s services and your setup. Given that the Cloudflare Zero Trust tunnel provides robust encryption, you can confidently operate this connection over port 80. This choice ensures a seamless flow of traffic straight from Cloudflare’s secure endpoints to your Home Assistant (HA) host, all the while maintaining the integrity and confidentiality of your data.
During this process, your server will host *.pem files in a public directory. These files are critical for the authentication process, serving as digital certificates that verify your server’s identity to Tesla’s API. It’s important to note that while these files are accessible, they are securely managed and play a pivotal role in the authentication sequence, ensuring that only authorised requests are processed by your Tesla API application.
By carefully following these guidelines, you’ll establish a secure and efficient communication channel between your Home Assistant setup and Tesla, enabling advanced control and integration of your vehicle with your smart home ecosystem.
Note: URL is the IP address and the receiving port of your Nginx Docker host as per step 2.2

4. Create a Tesla developer account
4.1 Get going with your Tesla Developer account.
Go to developer.tesla.com and register as a developer with your standard Tesla account. Two-factor authentication must be set up for the account; I used Microsoft Authenticator as the app.
Tesla required an Australian Business Number (ABN). Smart Motion has a valid one, so the example used that. However, if you do not, it may be possible to create a dummy ABN. I have read that Tesla has promised to remove the ABN requirement. If this has been done, please post a message below.
Once you set up the account, create a pro forma app authorised to access the vehicle.
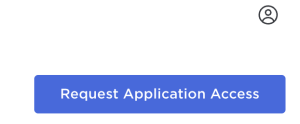
4.2 Request Application Access
Once logged into the developer dashboard choose ‘Request Application Access’.
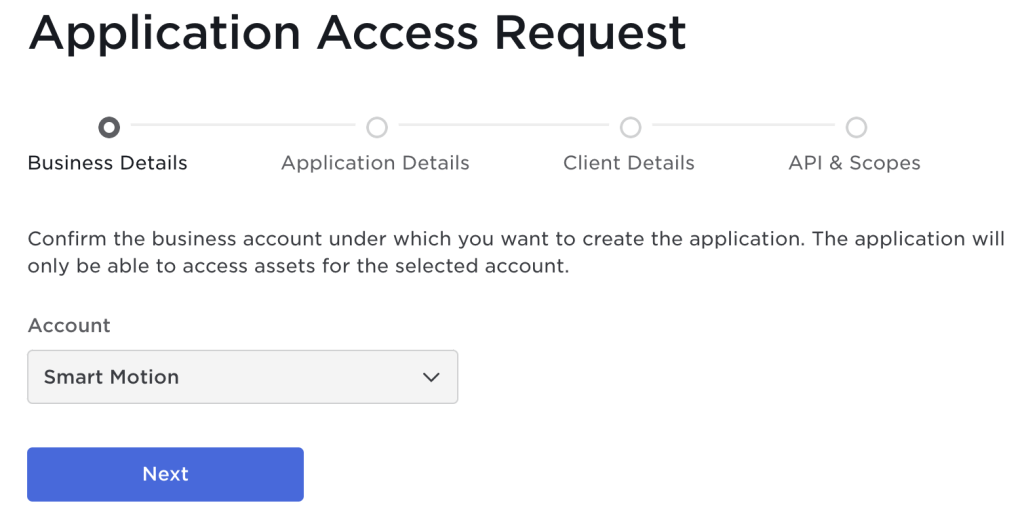
4.3 Choose the account which you have just created.
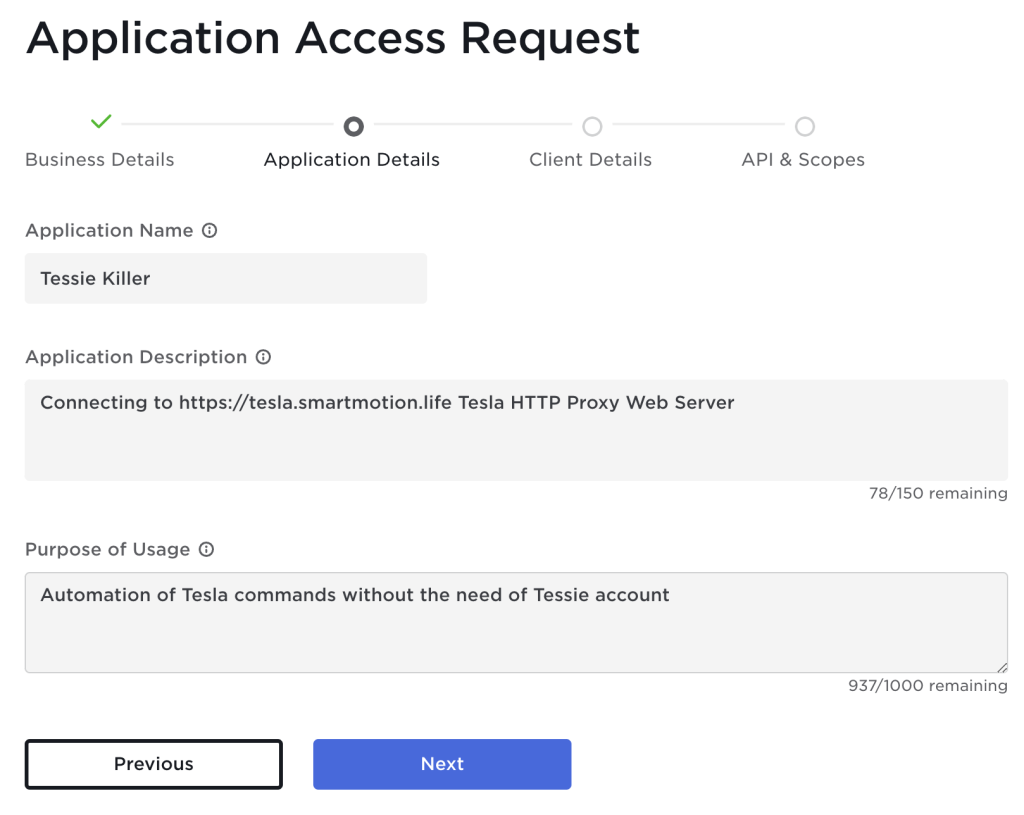
4.4 Write a short description of the purpose of this application
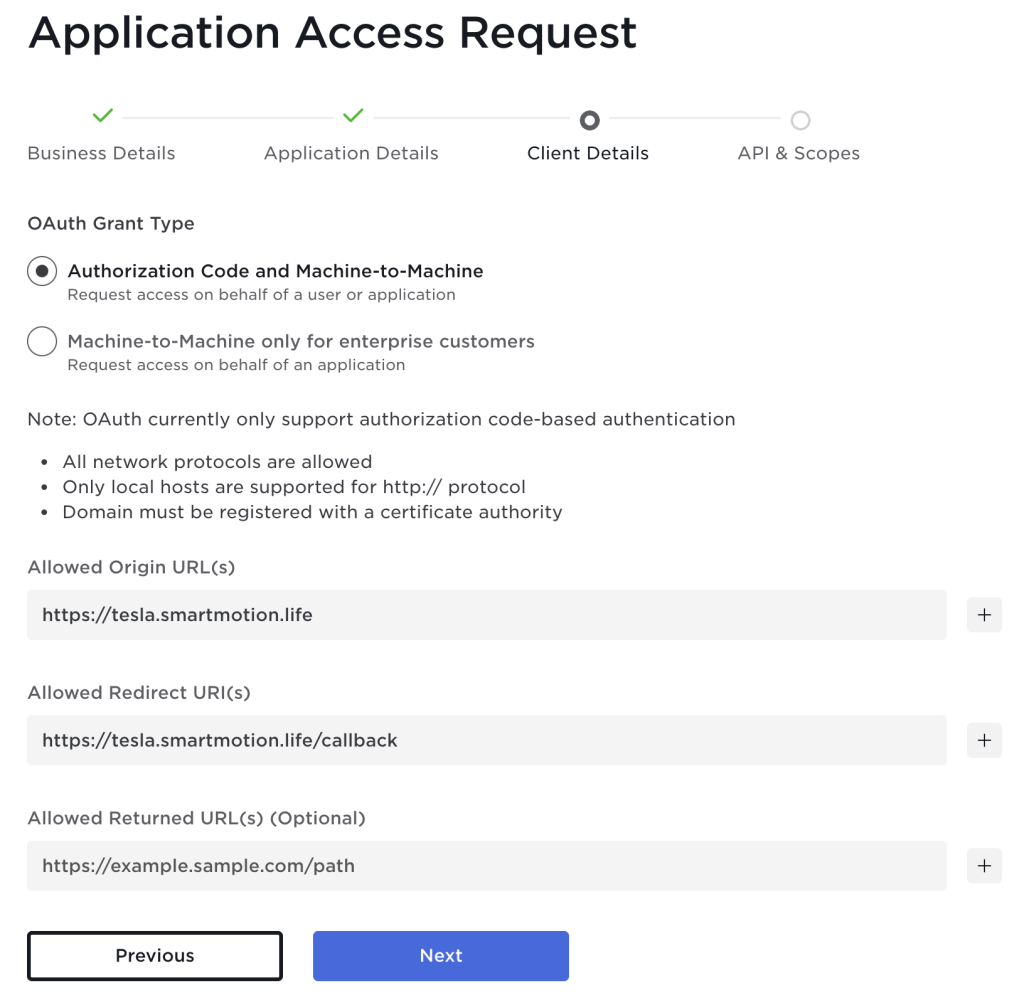
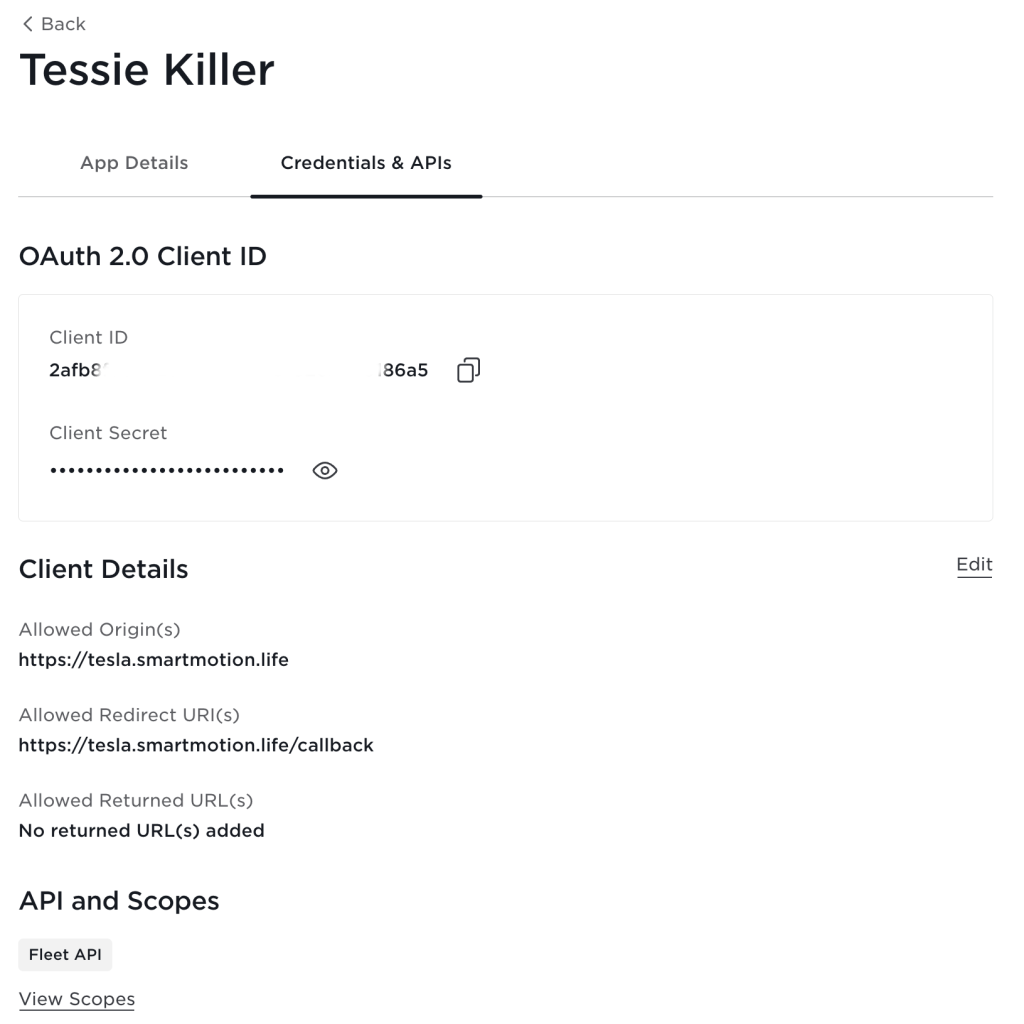
4.5 Enter the client details for your configuration
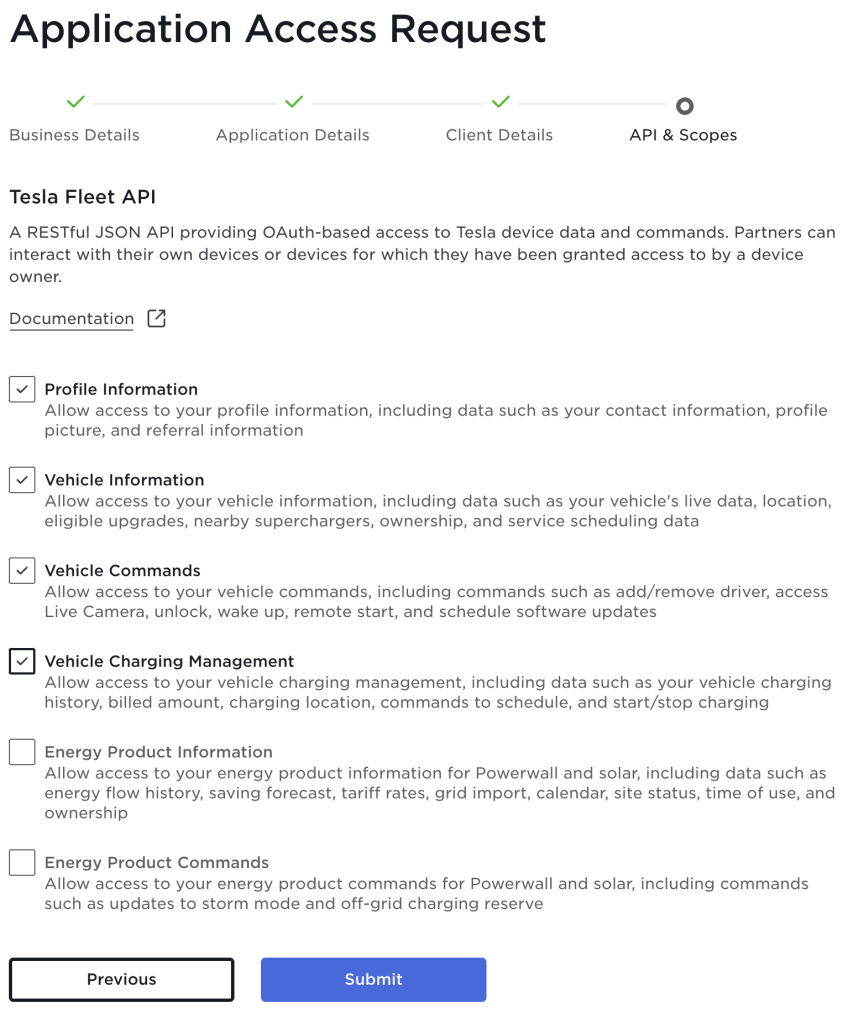
4.6 Specify the API & Scopes for what you will use it for, I am only accessing vehicle information hence my choices.
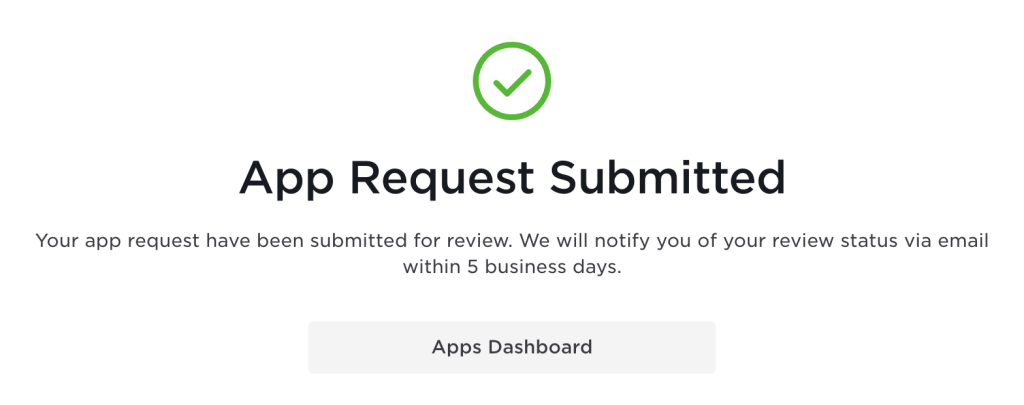
4.7 App Request Submitted
After a few seconds, Tesla will send you an automatic approval email. Important: Tesla now checks whether the domain can be reached via the Internet and whether the certificate is correct.
If it worked, you will see the app you created in your account.
4.8 You should now see an active application within your dashboard, choose to ‘View Details’
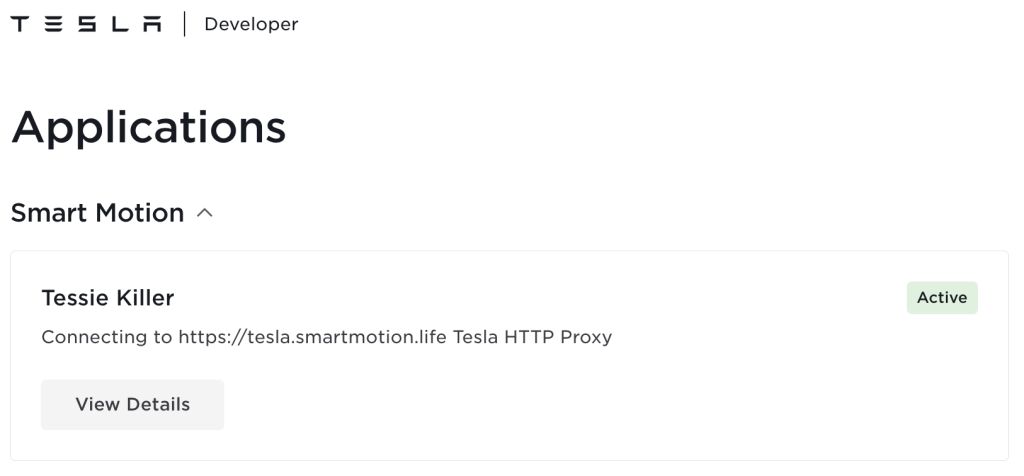
4.9 Copy and store securely the details, you will need them in step 5.3 below.
5. Install Tesla HTTP Proxy Web Server
5.1 Create the directory for selfsigned.pem (file will be created automatically)
$ mkdir /config/tesla_http_proxy
5.2 Using the example create a /data/config.sh file.
CLIENT_ID & CLIENT_SECRET are in step 4.9
DOMAIN matches step 3.4
PROXY_HOST is the internal hostname of your docker machine.
REGION STRING OPTIONS
-
- “North America, Asia-Pacific”
- “Europe, Middle East, Africa”
- “China”
#!/bin/bash
CLIENT_ID='2afbxxxxxxxxxxxxx186a5'
CLIENT_SECRET='ta-secret.ixxxxxxxxxx!HD'
DOMAIN='tesla.smartmotion.life' # Public FQDN
PROXY_HOST='docker.smartmotion.life' # Local hostname (not IP) of this docker host
REGION='North America, Asia-Pacific'
OPTIONS_COMPLETE=1
5.3 Create a Docker compose file
This will start the Tesla HTTP Proxy Docker container.
Create a docker volume to store the data
$ docker volume create tesla_http_proxy
Note: Modify the “source:” locations below as per the comment next to them. Do not change the “target:”!
volumes:
  tesla_http_proxy:
    external: true
services:
  tesla_http_proxy:
    container_name: tesla_http_proxy
    restart: always
    image: "iainbullock/tesla_http_proxy:latest"

    environment:
      - TZ='Australia/Adelaide'
      - CLIENT_ID='2afbxxxxxxxxxxxxx186a5'
      - CLIENT_SECRET='ta-secret.ixxxxxxxxxx!HD'
      - DOMAIN='tesla.smartmotion.life' # Public FQDN
      - PROXY_HOST='docker.smartmotion.life' # Local hostname (not IP) of this docker host
      - REGION='North America, Asia-Pacific'

    stdin_open: true
    tty: true

    entrypoint: "/app/run.sh"
    working_dir: /app

    volumes:
      - tesla_http_proxy:/data
      # Webserver root for the $DOMAIN virtual server. Change the path according to your webserver setup. Path must exist or this container won't start
      - type: bind
        source: /config/nginx/htdocs # Refer to step 2.1
        target: /share/nginx #Do not modify
      # Path to tesla_http_proxy directory inside /config on Home Assistant instance. Change according to your HA setup. Path must exist or this container won't start
      - type: bind
        source: /config/tesla_http_proxy #Refer to step 5.1
        target: /share/home-assistant #Do not modify
      - /data/config.sh:/data/config.sh

    network_mode: bridge
    ports:
      - 4430:443
      - 8099:8099

volumes:
  tesla_http_proxy: {}
$ docker compose up -d
Hint: Leave this terminal window open watching the logs, it will help if you need to debug anything.
$ docker compose logs -f
6. Configure Tesla HTTP Proxy add-on
You are now ready to configure the Tesla HTTP Proxy add-on. You should be able to access this at https://tesla.yourdomain.com.
HINT: If the access_token file already exists the flask server will not start. Remove the file which is within the docker container and restart the container
1. $ docker exec -it tesla_http_proxy /bin/bash
2. c239fe89d29d:/app# rm /data/access_token

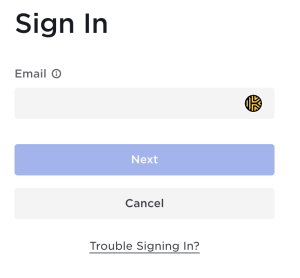
6.1 Generate OAuth token
![]()
Sign into your Tesla account.
6.2 Test public key endpoint
![]()
A com.tesla.3p.public-key.pem file should download through your web browser.
6.3 Register Partner account

If you are watching the log files you will see a “Generating Partner Authentication Token” in the “tesla_http_proxy” logs
tesla_http_proxy    | [11:03:45] main:INFO: *** Generating Partner Authentication Token ***
tesla_http_proxy    | [11:03:45] main:INFO: {"access_token":"fGhYxPoQu4lYcW4Pp5yO8rBj0dCsQ6UuNjKbMmFt5KlNa7GyCmEsJ2sHg1WtC8pBc7nB5lQgP9aZj3kQp9sKv4gQw1cKoRi3vRwKb8rGh6tGqLpNjMzFe4vQxIbHg2rHn5jBf1pQw1oDu3kRw9rHj3gKl6jBf8qGr6wJpNc7fNv4wOx1hGv2sFp6wDy4vKb8sLp3vKt5jRf1oQu3lHv2rKo7tQw1oEz3sKp9rHl3gKa8r
","expires_in":28800,"token_type":"Bearer"}
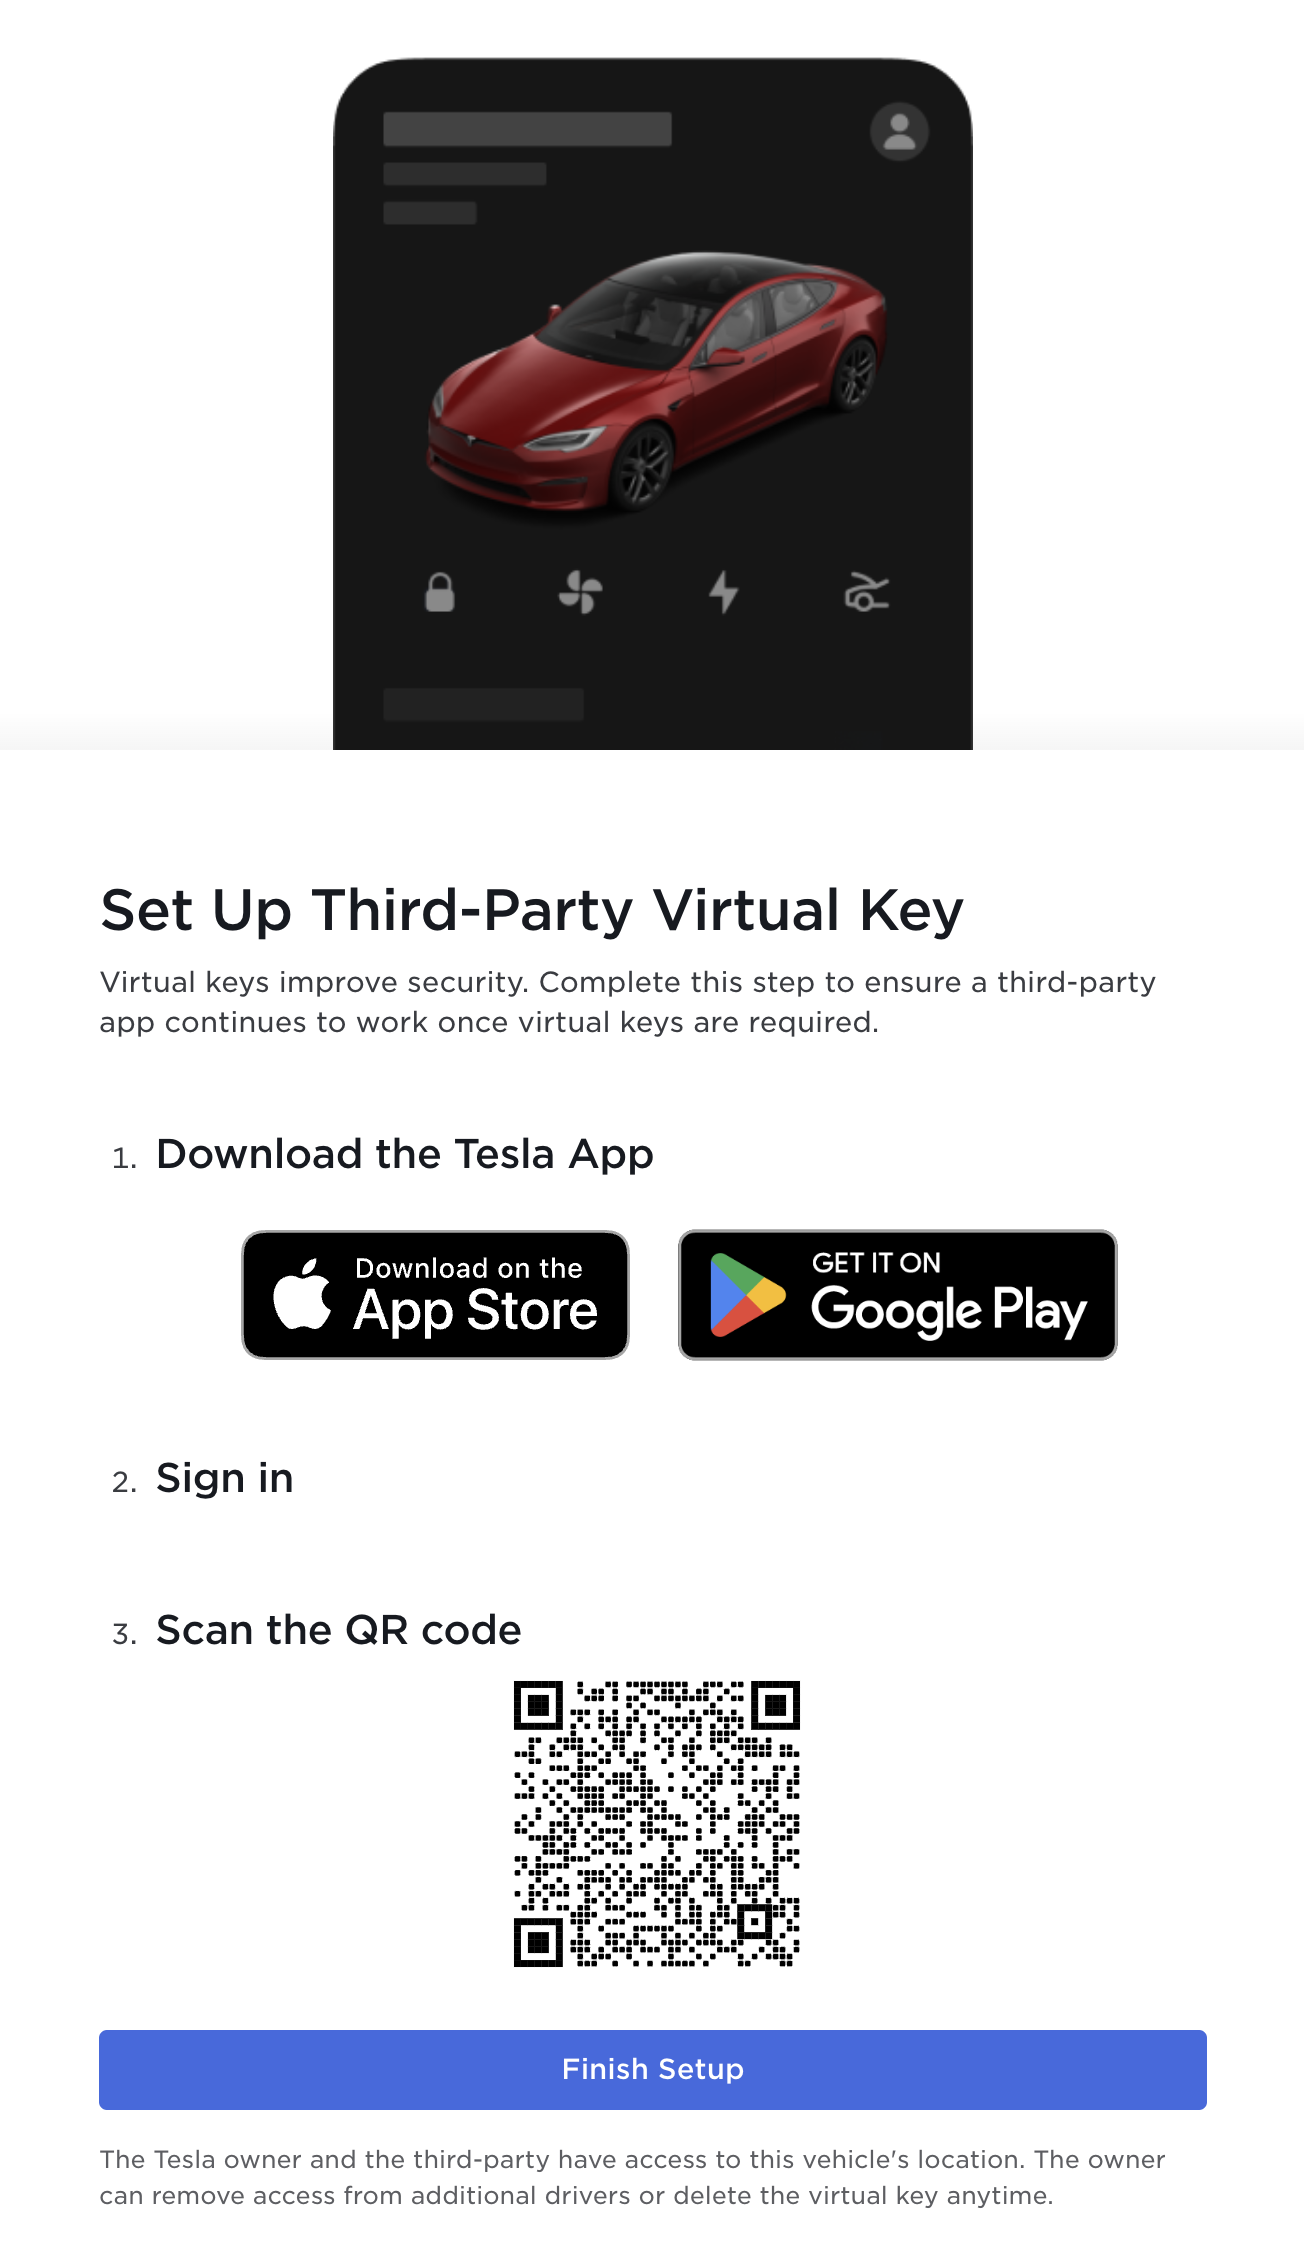
6.4 Enrol private key into your vehicle
![]()
When the QR code displays use your phone with the Tesla app installed to open the associated link; this will launch and register the key with your vehicle.
6.5 Shutdown Flask server to enable the proxy server
It is critical to enable the Tesla HTTP Proxy server by shutting down the flask server.
![]()
Note: You will see a call out warning you that the ‘Page not found’ is to be expected.
7. Install the Tesla Custom Integration
7.1 Home Assistant Tesla Custom Integration installation
You now have a ‘Refresh Token’ that will enable the Tesla Custom Integration to authenticate. Install it from GitHub repository link or simply click the ‘Add Repository’ button below for a quick setup and add the repository.
![]()
7.2 Agree that you need the Tesla HTTP Proxy, which you have already done.
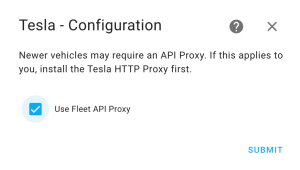
7.3 Enter your email address and the ‘Refresh Token’ from step 6.10.
EMAIL = Tesla login email
REFRESH TOKEN = Located in the file within your docker volume /var/lib/docker/volumes/tesla-http-proxy_tesla_http_proxy/_data/refresh_token
PROXY URL = Refer to PROXY_HOST in 5.3, with the port number associated, in my case 4430
PROXY SSL CERTIFICATE = Locate the file within your tesla_http_proxy directory /config/tesla_http_proxy/selfsigned.pem
TESLA DEVELOPER CLIENT ID = Refer to the Client ID in 5.3 from your https://developer.tesla.com account

7.4 Within your integrations you will now see commands to control your Tesla.
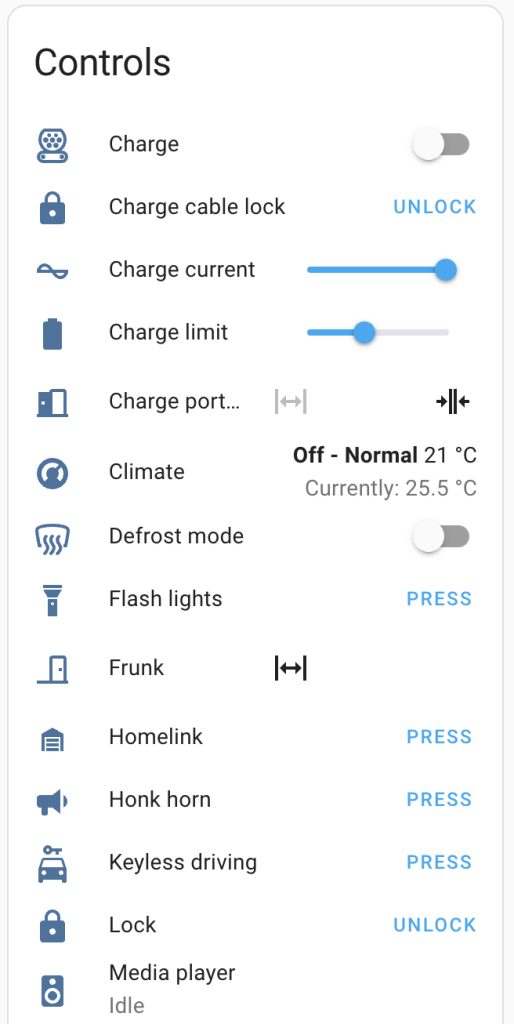
Congratulations! You’ve now got your own Tesla Custom Integration with Home Assistant on Docker working without the need for ongoing subscription to Tessie! Have questions or feedback for Home Assistant with Cloudflare Zero Trust? Feel free to share your thoughts or ask for help in the comments below.
Did this guide help you secure your Home Assistant remotely? If you found it valuable and are feeling generous, consider Buying Me A Coffee. Your support encourages me to create more helpful content like this. Cheers!

Hi, im hoping for some community assistance!
I’m trying to complete my fleet api application for use with homeassistant and can’t get beyond the client details page.
I enter the address and get the error: Invalid domain. Domain must be registered with a certificate authority and cannot contain “Tesla”
The domain I’m using (https://tesproxy.waring.me) has certificate provided as part of reverse proxy config – I can navigate to the site using a browser and it looks ok.
No matter what I try to enter, nothing seems to allow me to move onto the next page of fleet api setup.
Having lost too many hours trying out how to progress, I’m stumped 🙁
Help!!
Hi all,
I’m struggling with the Tesla Custom Integration on my Synology NAS (Docker).
I’m getting a ValueError: unknown url type: ‘/api/1/products’ error in HA log, when the integration tries to fetch my Tesla products.
I have no errors in the other component, and HAs log indicate that connection is OK.
Thanks!
After a ton of troubleshooting, changing all parameters to get a reaction in the logs, I found that there were problems resolving the DNS name to my “local docker machine”.
In the Cloudflare DNS dashboard, I created a new A record (docker.mydomain.dk –> 10.0.0.50 –> proxy off) to point to my local IP of my Synology NAS, which is the “local docker machine” in my case.
Changed the config.sh file to match:
PROXY_HOST=’docker.mydomain.dk’
Changed the compose file of Tesla_http_proxy to match:
– PROXY_HOST=’docker.mydomain.dk’
Deleted the refresh token for the Flask app to run again.
Command: docker exec -it tesla_http_proxy /bin/bash
Command: rm /data/access_token
Ran the Flask’ app setup again and put in the matching proxy URL in the Tesla – Configuration for the HA integration.
https://docker.mydomain.dk:4430
Hi. Tanks for your guide. It´s great.
I´ve followed it, but it fails at the last, when I configure the tesla integration in HA. I think the problem is the ssl proxy. HA doesn´t get the selfsigned.pem archive.
Do you have some idea?
I try all, but it´s imposible. I´m desesperate.
Tanks for all
Have you got any logs to send to help debug?
thanks for the guide! I have an issue which I hope you could solve:
Everything works here except I can’t get the refresh token. Somehow the refresh token is not being put into the data folder. Everything else seems to be working…! I just need to get the refresh token.
Is there another method to get the refresh token or a solution why it isn’t being put in the folder? It doesnt seem to be in the log either. The addon has a paste function to paste the URL after you fill in the generate OATH token.
My docker-compose file is in volume2/docker/tesla_http_proxy.
The one you mentioned(/var/lib/docker/volumes/tesla-http-proxy_tesla_http_proxy/_data/refresh_token) seems to have a typo, but anyway my docker images aren’t there: so I expect the file to show up in volume2/docker/tesla_http_proxy/data or _data or something. Reading the config.sh file from the data folder goes fine, also the .perm files are being put correctly into the HA folder and into the web folder. Just the refresh token doesnt show up.
Thanks!
thanks for the guide! I have an issue which I hope you could solve:
Everything works here except I can’t get the refresh token. Somehow the refresh token is not being put into the data folder. Everything else seems to be working…! I just need to get the refresh token.
Is there another method to get the refresh token or a solution why it isn’t being put in the folder? It doesnt seem to be in the log either. The addon has a paste function to paste the URL after you fill in the generate OATH token.
My docker-compose file is in volume2/docker/tesla_http_proxy. I created a data folder.
The one you mentioned seems to have a typo, but anyway my docker images aren’t there: /var/lib/docker/volumes/tesla-http-proxy_tesla_http_proxy/_data/refresh_token
Everything works here except I can’t get the refresh token. Somehow the refresh token is not being put into the data folder. Everything else seems to be working…! I just need to get the refresh token.
Is there another method to get the refresh token or a solution why it isn’t being put in the folder? It doesnt seem to be in the log either.
My docker-compose file is in volume2/docker/tesla_http_proxy. I created a data folder.
The one you mentioned seems to have a typo, but anyway my docker images aren’t there: /var/lib/docker/volumes/tesla-http-proxy_tesla_http_proxy/_data/refresh_token
It all seems to work here except 1 (big) issue: the refresh token isn’t stored in the /data folder in my docker folder 🙁 Where can I find the refresh token? It’s not showing up in the stdout logs. How do I make it store it in the data folder? Or where can I access it elsewhere? The ‘Generating Partner Authentication Token’ is showing up in the logs. I assume this is not the refresh token.
the selfsigned.pem is there ha/config/tesla_http_proxy
the public key.pem is placed in the webfolder.
I run through all steps and all seem to succeed. When I want to add it to the HA integration I have no refresh token to fill in.
I run the docker-compose file inside /volume2/docker/tesla_http_proxy
It all seems to work here, except the refresh token is not showing up in the data folder of my docker image :(. So where can I find the refresh token or how can I make sure it shows up in the docker folder. It does not show up in the log. Everything else seems to be working.
I am assuming the refresh token is different from the partner authentication token.
I get this error inside home assistant when I try and setup the custom integration( step 7.3):
`ssl.SSLCertVerificationError: [SSL: CERTIFICATE_VERIFY_FAILED] certificate verify failed: Hostname mismatch, certificate is not valid for ‘mastodon.local’. (_ssl.c:1000)`
and this is what I get on the server itself `2024/07/02 19:53:42 http: TLS handshake error from 192.168.86.51:47730: EOF` (192.168.86.51 is the ip of my home assistant install)
when I navigate to https://mastodon.local:4430 (my proxy url) I can see it’s protected with a self signed cert with a cname of mastodon.local.
I’m at a bit of a loss about what I might have got wrong here! I am running home assistant over https via nabu casa. I have tesla proxy running on a different docker host in a different vlan, but they can communicate fine (and I can see from the logs it’s trying to establish a connection). Any suggestions would be amazing!
The integration fails to setup for me. HA logs suggest:
`…
File “/usr/local/lib/python3.12/ssl.py”, line 917, in do_handshake
self._sslobj.do_handshake()
ssl.SSLCertVerificationError: [SSL: CERTIFICATE_VERIFY_FAILED] certificate verify failed: self-signed certificate (_ssl.c:1000)`
Any ideas what the issue could be?
I tried to rewind as much as possible and I deleted the ‘com.tesla.3p.public-key.pem’ file in htdocs and followed an earlier comment to rm /data/access_token and start the tesla_http_proxy steps again. I generate an OAuth token and then all I get is 404 after 404 when I click step 2 button. No file exists in htdocs.
I have the same issue.
It seems that Tesla Custom integration doesn’t accept Self Signed certificate in order to talk with tesla-http-proxy.
Is it possible to disable ssl validation?
Thank you
Hi,
I keep getting this issue.
run.py: error: argument –region: invalid choice: ‘”Europe, Middle East, Africa”‘ (choose from ‘North America, Asia-Pacific’, ‘Europe, Middle East, Africa’, ‘China’)
anybody who can help?
Somehow in my docker compose I have to remove the ‘ ‘. Then it works
thanks for the guide! I have an issue which I hope you could solve:
Everything works here except I can’t get the refresh token. Somehow the refresh token is not being put into the data folder. Everything else seems to be working…! I just need to get the refresh token.
Is there another method to get the refresh token or a solution why it isn’t being put in the folder? It doesnt seem to be in the log either. The addon has a paste function to paste the URL after you fill in the generate OATH token.
My docker-compose file is in volume2/docker/tesla_http_proxy. I created a data folder.
The one you mentioned seems to have a typo, but anyway my docker images aren’t there: /var/lib/docker/volumes/tesla-http-proxy_tesla_http_proxy/_data/refresh_token
have you solved the problem of “run.py: error: argument –region: invalid choice: ‘”Europe, Middle East, Africa”‘ (choose from ‘North America, Asia-Pacific’, ‘Europe, Middle East, Africa’, ‘China’)” ? I found the same problem
Have a look in section 5.2, there are 3 region options. I also thought that it was unusual that you need to include all of the options and not just one of them. So everything between the quotes is your option.
– “North America, Asia-Pacific”
– “Europe, Middle East, Africa”
– “China”
Did you solve this problem?
Hi, I keep getting this issue.
run.py: error: argument –region: invalid choice: ‘”Europe, Middle East, Africa”‘ (choose from ‘North America, Asia-Pacific’, ‘Europe, Middle East, Africa’, ‘China’)
I put REGION=‘Europe, Middle East, Africa’ but it gives the same problem as above
Thanks for the guide. I wish I had dug into the issues in the Github project before attempting to get this setup properly with with my Nginx Proxy Manager running on the internet side of things with my home server. https://github.com/iainbullock/tesla-http-proxy-docker/issues/40
The biggest hurdle for me was getting local DNS working properly. I had totally blanked over the fact that I was running AdGuard which was managing local host listing.
The next big thing I hit was my refresh token had some how expired while going through all of the motions of setting everything up. I needed to delete it and then rerun initial setup. As TBONAFIDE pointed out earlier you can delete access_token to restart things.
Thanks for the detailed write up! I went through everything and failed at step 7.3 with HA logs giving a very generic error:
[homeassistant.config_entries] Config entry ‘[redacted]@[redacted].com’ for tesla_custom integration could not authenticate
I tailed nginx & Tesla HTTP Proxy logs, and it looks like Tesla never called my server to authenticate. I suspect that:
1. My refresh token expired – any idea how I can generate a new refresh token?
2. I’m missing a 443 config in Cloudflare – did you have to do anything special to route port 443 of your domain to 4430 on your machine?
The port 4430 is an internal call and needs to be resolvable on your internal network. It doesn’t need Cloudflare. I suggest adding it to your DNS if it isn’t already and running through the process again.
thanks for the guide! I have an issue which I hope you could solve:
Everything works here except I can’t get the refresh token. Somehow the refresh token is not being put into the data folder. Everything else seems to be working…! I just need to get the refresh token.
Is there another method to get the refresh token or a solution why it isn’t being put in the folder? It doesnt seem to be in the log either. The addon has a paste function to paste the URL after you fill in the generate OATH token.
My docker-compose file is in volume2/docker/tesla_http_proxy. I created a data folder.
The one you mentioned seems to have a typo, but anyway my docker images aren’t there: /var/lib/docker/volumes/tesla-http-proxy_tesla_http_proxy/_data/refresh_token
Thanks for the reply. I was able to successfully authenticate the Tesla Custom Integration, but I was not able to control my car and got this error from Tesla HTTP Proxy whenever I attempted: “Session info error: BadParameter: invalid public key.” The documentation says that error means that the key has not been enrolled in the vehicle, but I’ve verified that it has (I clicked Approve on the popup and it shows up under Locks in my car). Not sure if other folks are seeing anything similar.
For those following along…
I found out that my main issues was that my HA container cannot reach “hostname.local” and I had to regenerate keys for “hostname” (it nothing to do with the port 4430 as you suspected). Tried this out by going into my HA container (docker exec -it bach), then trying to ping hostname.local.
I was able also to figure out how to start the Flask server again to get a new token. For those who need to do that, all you have to do is:
1. docker exec -it bash
2. rm /data/access_token
3. restart Tesla HTTP Proxy container
Hi, thanks for the guide, but there are at least 2 errors:
1. server_name tesla.yourdomain.com; # Change to match your own FQDN. You have to add the semi-colon at the end of your domain, Chat GPT told me after I got errors.
2. Docker-compose contains 2 volume declarations, I guess the last 2 lines ‘volumes:
tesla_http_proxy: {}’ have to be deleted.
Still I don’t get it to work, selfsigned.pem is not reachable after starting the HA integration, although existing in /config/tesla_http_proxy/
‘pi@RPi4ServerONE:/config/tesla_http_proxy $ ls -l
total 4
-rw-r–r– 1 root root 830 May 3 17:24 selfsigned.pem’
Regards, Feu77
Thanks, you are correct, I have checked my configuration and this is a typo and fixed! Appreciated!!
I have confirmed that the docker-compose.yml is correct. The first ‘volumes’ tells the container that the volume tesla_http_proxy is external to the container. The last one at the bottom of the file actually creates it on the file system if it doesn’t exist. You will find it here /var/lib/docker/volumes/tesla-http-proxy_tesla_http_proxy
If you can post some error messages from your home-assistant.log file that would be great.
Also, what does your Home Assistant docker-compose.yml file look like? Note the volumes section within it, are you running it in /config? Check out the comment in 2.1 above and I have just made it clearer.
volumes:- /config:/config
- /etc/localtime:/etc/localtime:ro
- /var/run/dbus:/run/dbus:ro
Ok didn’t know about this volume create command. The volume ‘tesla_http_proxy’ was already created, perhaps the reason for the error message.
So as things don’t work as expected I deleted the volume and did with your docker-compose. VSC marks an error on that line but it starts…creating tesla_http_proxy_tesla_http_proxy volume….OK I don’t get it…and aha…can’t docker-compose down the container getting an error:
* Task wird ausgeführt: docker compose –file ‘docker-compose.yml’ –project-name ‘tesla_http_proxy’ stop
yaml: unmarshal errors:
line 44: mapping key “volumes” already defined at line 26
So i’ts probably best to delete both lines and docker-compose down, then up again and create the volume manually with ‘docker volume create –name=tesla_http_proxy’
Did you get that error with selfsigned.pem is not reachable fixed?
I have something similar I believe.
Tesla Integration says it’s succesful, but keeps reinitializing
My Docker compose;
volumes:
– /home/frederic/Home_Assistant/config:/config
– /mnt/media:/media:ro
– /etc/localtime:/etc/localtime:ro
In step 7.3 above what are you inputting as Proxy SSL Certificate location? Also, any logs would help fault find.
In the location of your docker-compose.yml file you can
docker-compose logsOr home-assistant.log when you are submitting 7.3
Hope this helps.
> Step 1 “Ensure your Home Assistant is accessible over the internet.”
Sorry, but this is such a bad idea. All Smart Home components should be NEVER reachable through the internet. Nobody can guarantee that HA has or will have security holes in the future. The only secure way to access HA remotely is a VPN connection. So if this Tesla integration requires opening ports, it is a design failure. Instead it should be a separate container which is ONLY used to provide the API for the Tesla Cloud and ONLY by an additional LOCAL port/API it should be reachable by the Tesla HA addon. So HA itself wouldn’t be reachable through the internet.
> Sorry, but this is such a bad idea. All Smart Home components should be NEVER reachable through the internet.
While it’s true that exposing Smart Home components to the internet can pose significant risks, a Cloudflare Zero Trust configuration can offer enhanced security. This setup doesn’t directly expose your service to the internet and includes features like geo-blocking, which restricts access to your instance from certain countries. Additionally, implementing multi-factor authentication can further mitigate potential risks.
> So if this Tesla integration requires opening ports, it is a design failure. Instead it should be a separate container which is ONLY used to provide the API for the Tesla Cloud and ONLY by an additional LOCAL port/API it should be reachable by the Tesla HA addon. So HA itself wouldn’t be reachable through the internet.
This is correct, the Tesla HTTP Proxy server is running in a separate container through Cloudflare Zero Trust and HA does not need to have access to the internet.
thanks for the guide! I have an issue which I hope you could solve:
Everything works here except I can’t get the refresh token. Somehow the refresh token is not being put into the data folder. Everything else seems to be working…! I just need to get the refresh token.
Is there another method to get the refresh token or a solution why it isn’t being put in the folder? It doesnt seem to be in the log either. The addon has a paste function to paste the URL after you fill in the generate OATH token.
My docker-compose file is in volume2/docker/tesla_http_proxy.
The one you mentioned(/var/lib/docker/volumes/tesla-http-proxy_tesla_http_proxy/_data/refresh_token) seems to have a typo, but anyway my docker images aren’t there: so I expect the file to show up in volume2/docker/tesla_http_proxy/data or _data or something. Reading the config.sh file from the data folder goes fine, also the .perm files are being put correctly into the HA folder and into the web folder. Just the refresh token doesnt show up.
Thanks!
I had the same problem. You need to be root to get de refresh token
1º) sudo -su
1º) nano /var/lib/docker/volumes/tesla-http-proxy_tesla_http_proxy/_data/refresh_token
Sorry:
1º) sudo -s